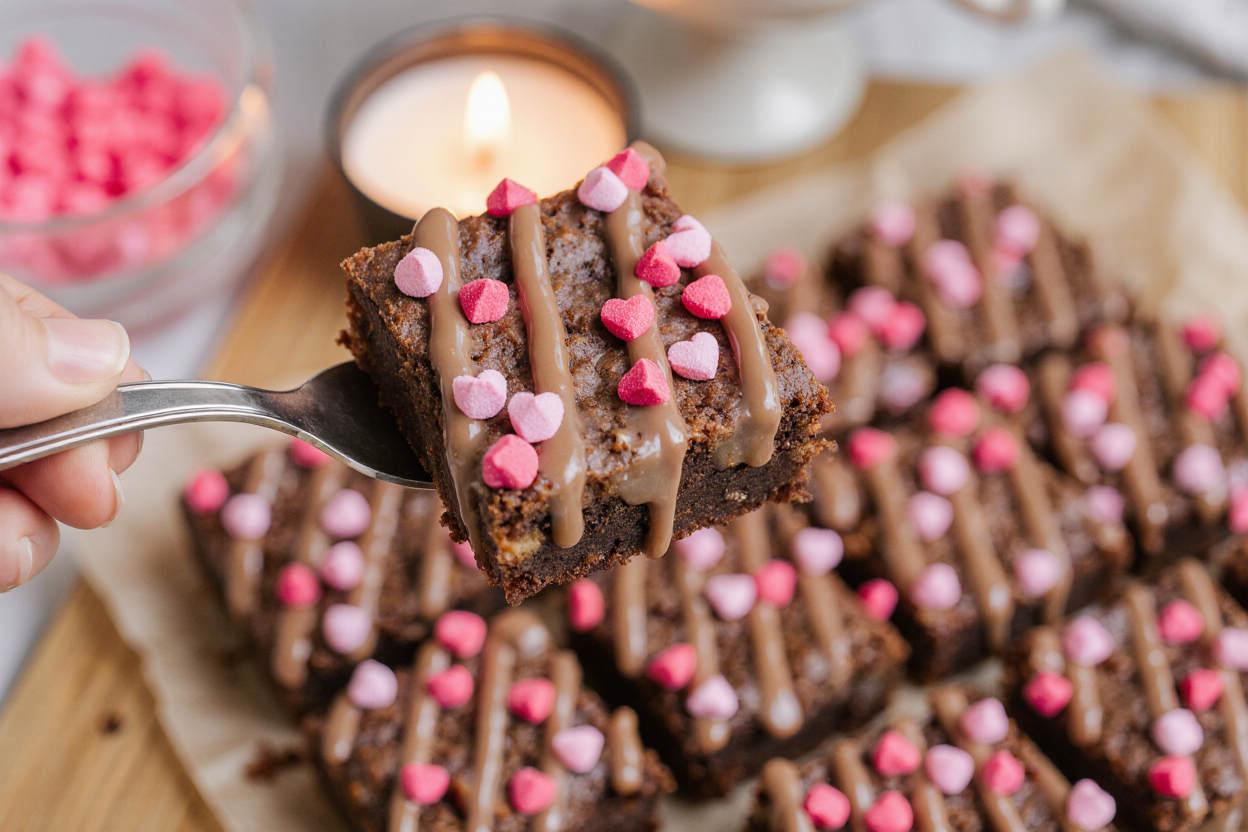
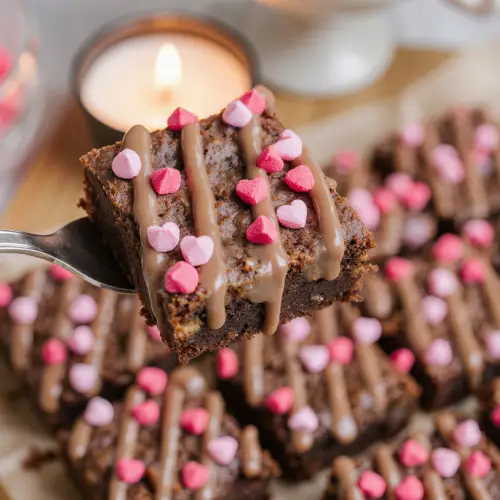
Decadent Valentine’s Day Triple Chocolate Brownies
When February rolls around, there is one flavor that speaks the language of love better than any other: deep, dark, indulgent chocolate. These Valentine’s Day Triple Chocolate Brownies are more than just a dessert; they are a decadent experience. Featuring a fudgy, melt-in-your-mouth interior and that signature crackly, tissue-paper top, these brownies are the ultimate way to show someone you care.
What makes this recipe a standout is the combination of high-quality dark chocolate in the batter and chunky bits of white and milk chocolate folded throughout. It’s a “triple threat” of cocoa goodness that feels incredibly sophisticated but is surprisingly simple to whip up in your own kitchen. Whether you’re planning a romantic dinner for two or a festive Galentine’s party with your best friends, these brownies are guaranteed to be the star of the show. Are you ready to fall in love with the best brownie you’ve ever tasted? Let’s get baking!
Why are These Valentine’s Brownies a Must-Try?
- The Ultimate Fudgy Texture: Unlike cakey brownies, these are dense, rich, and slightly gooey in the center—exactly how a brownie should be.
- Triple Chocolate Magic: With a base of dark chocolate and mix-ins of milk and white chocolate, you get a complex flavor profile in every single bite.
- The “Crackly” Top: We use a specific whisking technique to ensure you get that beautiful, shiny, flaky crust that everyone raves about.
- Perfectly Customizable: From festive heart-shaped sprinkles to a drizzle of raspberry sauce, these are the perfect canvas for your Valentine’s creativity.
- Foolproof Instructions: Even if you aren’t a seasoned baker, our step-by-step guide will help you achieve professional-level results on your first try.
For ideas on how to elevate your chocolate game, check out our tips on tempering chocolate or our guide to the best cocoa powders for baking.
Valentine’s Brownie Ingredients
For the Brownie Base
- Unsalted Butter – High-quality butter provides the richness and fat necessary for that fudgy mouthfeel.
- Dark Chocolate – Look for a bar with at least 60-70% cocoa solids. This provides the deep, intense chocolate foundation.
- Caster Sugar – Known as superfine sugar, it dissolves easily into the eggs to create that perfect crust.
- Large Eggs – These provide the structure and the “lift” for the brownies since we aren’t using chemical leaveners like baking powder.
- Vanilla Extract – A touch of high-quality vanilla rounds out the bitterness of the dark chocolate.
- Sea Salt – Just a pinch to balance the sweetness and make the chocolate flavors “pop.”
For the Dry Ingredients & Mix-ins
- Plain Flour – Also known as all-purpose flour. We use a relatively small amount to keep the brownies dense and fudgy rather than bready.
- Cocoa Powder – Use a high-quality Dutch-processed cocoa for a darker color and smoother flavor.
- Milk Chocolate Chunks – Provides a creamy, sweet contrast to the dark chocolate base.
- White Chocolate Chunks – Adds a beautiful visual pop and a buttery sweetness.
- Festive Sprinkles – Optional, but highly recommended for that Valentine’s Day charm!
Pro Tip: Add half a teaspoon of espresso powder to the melted chocolate mixture. You won’t taste the coffee, but it will make the chocolate taste twice as intense!
Step-by-Step Instructions for Valentine’s Brownies
Step 1: Prepare the Oven and Tin
Start by preheating your oven to 160°C (320°F) for a fan-assisted oven. If you don’t have a fan oven, set it to 180°C. Grease a 20 cm square baking tin with a little butter and line it with parchment paper. Ensure the paper hangs over the edges slightly; this “sling” makes it much easier to lift the brownies out once they are cooled.
Step 2: Melt the Butter and Dark Chocolate
Break your 185g of dark chocolate into small pieces and place them in a heatproof bowl with 185g of cubed unsalted butter. You can melt these together over a pan of simmering water (bain-marie) or in the microwave in 30-second bursts. Once smooth and glossy, set the bowl aside. It is crucial to let this mixture cool slightly so it doesn’t scramble the eggs in the next step!
Step 3: The Secret Ribbon Stage
In a large mixing bowl, combine your 3 large eggs and 275g of caster sugar. Using an electric hand whisk, beat the mixture on high speed for about 3 to 5 minutes. You are looking for the “ribbon stage”—the mixture should be pale, thick, and doubled in volume. When you lift the whisk, the batter should leave a trail (a “ribbon”) on the surface for a few seconds before sinking in. This is the secret to the crackly brownie top!
Step 4: Combine the Mixtures
Gently pour the cooled chocolate and butter mixture into the whisked eggs. Using a large metal spoon or a rubber spatula, fold the mixtures together using a “figure-eight” motion. Be gentle! You want to keep as much of that incorporated air as possible. At this stage, stir in your vanilla extract and a pinch of sea salt.
Step 5: Sift and Fold the Dry Ingredients
Place a fine-mesh sieve over your bowl and sift in the 85g of plain flour and 40g of cocoa powder. Sifting is vital here to remove any lumps of cocoa, which can be stubborn. Again, fold the dry ingredients in gently until no streaks of flour remain. The batter should look dark, rich, and velvety.
Step 6: Add the Chocolate Chunks
Now for the best part! Fold in your 75g of milk chocolate chunks and 75g of white chocolate chunks. Mixing types of chocolate ensures that every bite has a different level of sweetness and texture. Once combined, pour the batter into your prepared tin and smooth the top with a spatula.
Step 7: Bake to Perfection
Place the tin in the center of the oven and bake for 25 to 30 minutes. Unlike a cake, you don’t want a toothpick to come out completely clean. It should have a few moist crumbs attached. The brownies should have a slight “wobble” in the very center if you gently shake the tin; they will firm up as they cool to create that perfect fudgy texture.
Step 8: Decorate and Cool
If you are using sprinkles, scatter them over the top as soon as the brownies come out of the oven so they stick to the warmth. Let the brownies cool completely in the tin before attempting to cut them. For the cleanest lines, you can even chill them in the fridge for an hour before slicing.
Make-Ahead Options
Brownies are the perfect “make-ahead” dessert because they actually improve with age! The flavors deepen and the texture becomes even fudgier after 24 hours. You can bake these a day in advance and store them (un-cut) in the tin, covered with foil. If you want to prep even further ahead, you can freeze the baked brownie block for up to a month—just thaw at room temperature and add fresh sprinkles or a drizzle of chocolate before serving.
Storage Tips for Valentine’s Brownies
- Room Temperature: Keep in an airtight container for 3-4 days. Placing a piece of white bread in the container can help keep them extra moist!
- Fridge: If you like an ultra-dense, almost truffle-like brownie, store them in the fridge for up to a week.
- Freezer: Wrap individual squares in plastic wrap and store in a freezer bag for up to 3 months.
- The “Fresh” Hack: If your brownies have been sitting for a few days, microwave a square for 10-15 seconds. It will revive the chocolate chunks and make the brownie taste like it just came out of the oven.
Tips for the Best Valentine’s Day Brownies
- Don’t Over-Whisk After Adding Flour: Once the flour goes in, stop as soon as it’s incorporated. Over-mixing at this stage develops gluten, which makes brownies tough instead of fudgy.
- Quality Over Quantity: Since chocolate is the primary flavor, use the best dark chocolate you can afford. Avoid “cooking chocolate” or “compounds” which contain vegetable fats instead of cocoa butter.
- The Clean Cut: For perfect squares, wipe your knife with a hot, damp cloth between every single cut.
- Oven Temperature: Ensure your oven is truly at 160°C (fan). If it’s too hot, the edges will burn before the middle is set.
- Use the Right Tin: A 20cm (8-inch) square tin is the sweet spot. If your tin is too large, the brownies will be thin and dry.
Valentine’s Brownie Variations & Substitutions
- Heart-Shaped Brownies: Once the brownie block is cool, use a heart-shaped cookie cutter to stamp out festive individual portions.
- Raspberry Swirl: Drop small spoonfuls of seedless raspberry jam onto the batter before baking and swirl with a toothpick for a “Pink and Red” Valentine’s look.
- Gluten-Free: Replace the plain flour with an equal amount of almond flour or a 1:1 gluten-free baking blend. Because there’s so little flour, brownies adapt very well!
- Salted Caramel: Drizzle salted caramel over the top before adding sprinkles for an even more indulgent treat.
- Nutty Twist: Replace the white chocolate chunks with toasted walnuts or pecans for a satisfying crunch.
What to Serve with Valentine’s Day Brownies
- Fresh Raspberries or Strawberries: The tartness of berries is the perfect foil for the rich, heavy chocolate.
- Champagne or Prosecco: The bubbles and acidity of a sparkling wine cut through the density of the brownie beautifully.
- Vanilla Bean Gelato: Serve a warm brownie with a scoop of cold gelato for the classic “hot and cold” dessert experience.
- Pink Whipped Cream: Whisk heavy cream with a drop of red food coloring and a splash of rose water for a truly romantic side.
Valentine’s Day Brownies Recipe FAQs
Why did my brownies come out cakey instead of fudgy? This usually happens for two reasons: over-measuring the flour or over-baking. Ensure you aren’t packing the flour into your measuring cup, and always pull the brownies out when there is still a slight wobble in the center.
How do I get that shiny, crackly top? The crackly top is caused by the sugar dissolving into the eggs. Make sure you whisk the eggs and sugar long enough to reach the “ribbon stage.” If you cut the whisking time short, you’ll still have a delicious brownie, but it will have a duller, matte top.
Can I use milk chocolate instead of dark chocolate for the base? I don’t recommend swapping the dark chocolate in the batter for milk chocolate. Milk chocolate has a much higher sugar and milk solid content, which will make the brownies overly sweet and prevent them from setting correctly. Stick to dark for the base and use milk for the chunks!
My brownies are sticking to the parchment paper, what did I do wrong? Brownies are naturally sticky! Make sure you let them cool completely before trying to peel the paper away. If they are still sticking, they might be slightly underbaked. Pop them in the fridge for 30 minutes to firm up the fats, and the paper should peel right off.
Decadent Valentine’s Day Triple Chocolate Brownies
Ingredients
The Chocolate Base:
- 185 g Unsalted butter
- 185 g Dark chocolate 60-70% cocoa, chopped
- 275 g Caster sugar
- 3 Large eggs room temperature
- 1 tsp Vanilla extract
- Pinch of sea salt
The Dry Ingredients & Mix-ins:
- 85 g Plain flour All-purpose
- 40 g Cocoa powder Dutch-processed preferred
- 75 g Milk chocolate chopped into chunks
- 75 g White chocolate chopped into chunks
Optional: Heart-shaped sprinkles for decoration
Instructions
- Preparation: Preheat your oven to 160°C (fan) or 180°C (standard). Grease and line a 20cm (8-inch) square baking tin with parchment paper, leaving a slight overhang on the sides.
- Melt Chocolate: In a heatproof bowl, melt the butter and dark chocolate together using a bain-marie or in the microwave in 30-second intervals. Stir until glossy and set aside to cool slightly.
- The Ribbon Stage: In a separate large bowl, whisk the eggs and caster sugar using an electric hand mixer on high speed for 3–5 minutes. The mixture is ready when it is pale, doubled in volume, and leaves a “ribbon” trail when the whisk is lifted.
- Combine: Gently pour the cooled chocolate-butter mixture, vanilla, and salt into the egg mixture. Fold together with a spatula or large metal spoon using a figure-eight motion until just combined.
- Sift Dry Ingredients: Sift the plain flour and cocoa powder directly over the wet mixture. Fold in gently until no streaks of flour remain, being careful not to knock out the air.
- Add Chunks: Fold in the milk and white chocolate chunks until evenly distributed.
- Bake: Pour the batter into the prepared tin and smooth the top. Bake for 25–30 minutes. The brownies should have a slight “wobble” in the center and a shiny, crackly crust.
- Decorate & Cool: If using sprinkles, apply them immediately to the warm surface. Let the brownies cool completely in the tin before lifting them out and slicing.
Notes
- Don’t Overbake: A toothpick will not come out clean; it should have moist crumbs attached. If it’s clean, they are overbaked and will be cakey rather than fudgy.
- The Clean Cut: For bakery-style squares, refrigerate the brownie block for 1 hour before cutting. Use a large knife dipped in hot water and wiped dry between each slice.
- Room Temp Eggs: Ensure your eggs are at room temperature to achieve the best volume during the whisking stage.
- Storage: Store in an airtight container for up to 4 days at room temperature or 1 week in the fridge.