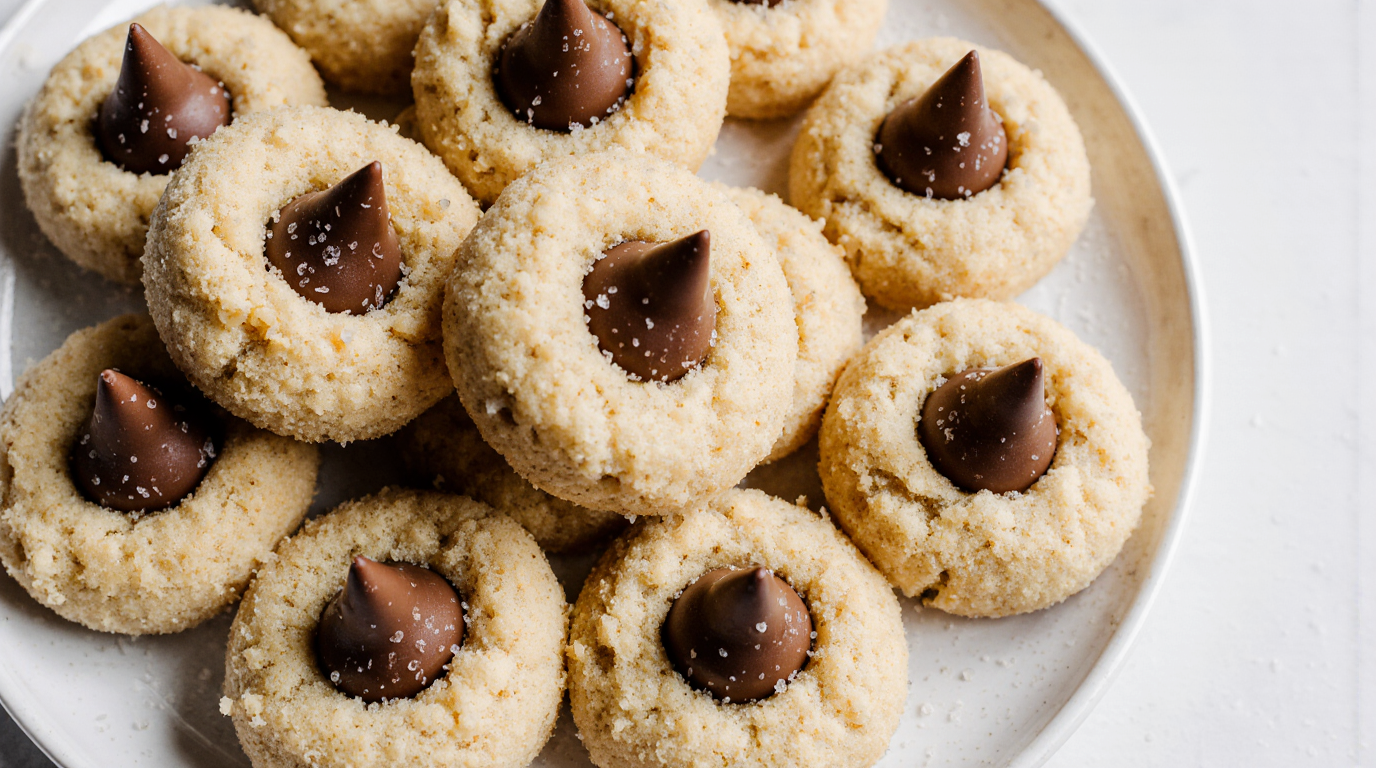
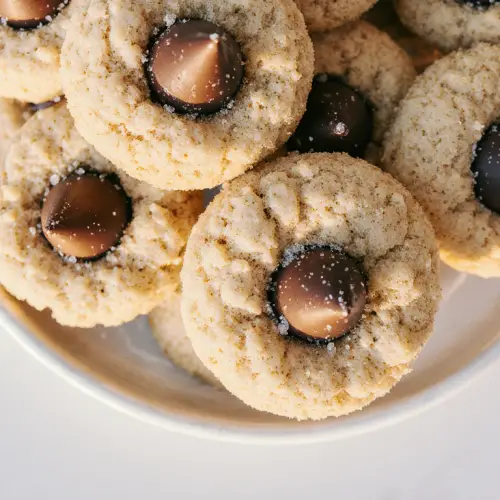
Soft and Thick Classic Peanut Butter Blossoms
The Peanut Butter Blossom holds a cherished spot in the pantheon of holiday cookies, and for good reason. This iconic treat perfectly marries the rich, salty flavor of peanut butter with the sweet indulgence of milk chocolate. This particular recipe ensures the cookies are extra soft, delightfully thick, and burst with creamy peanut buttery goodness in every bite. They are wonderfully simple to make—no complicated techniques, just pure holiday joy. The contrasting textures of the chewy cookie, the crunchy sugar coating, and the smooth, instantly recognizable chocolate kiss make this cookie a timeless classic. It’s a nostalgic staple that belongs on every cookie platter, perfectly embodying the warmth and tradition of the festive season. They are quick to prepare and always disappear quickly from the dessert table.
Why You’ll Love This:
- Perfectly Soft and Thick: Unlike many recipes that result in flat, crispy cookies, this formula is designed to produce thick, soft, and substantial cookies. The balance of sugars and the addition of peanut butter contribute to a beautifully tender crumb that stays soft for days.
- The Classic Flavor Combination: The pairing of rich, salty peanut butter with sweet milk chocolate is irresistible. The peanut butter dough provides the ideal chewy, savory base to hold the perfect chocolate kiss topping.
- Speedy Chocolate Setting: The genius of this recipe lies in the final freezer step. This quick chill prevents the chocolate kiss from melting into a puddle when pressed into the hot cookie, ensuring the chocolate sets quickly and maintains its perfect, iconic shape.
- High-Volume Holiday Baking: This recipe is straightforward and great for batch baking. With a dough that can be chilled for up to three days, you can easily prepare the foundation well in advance of your decorating day.
Perfect Occasion:
The Classic Peanut Butter Blossom is inherently tied to Christmas and the winter holidays. They are a must-have for annual cookie exchanges, where their recognizable shape and flavor are always popular. They are ideal for creating holiday gift tins and boxes, as they are durable and stay fresh for up to a week at room temperature. Their simple, festive appearance—especially when coated in colored sanding sugar—makes them perfect for holiday school parties, office gatherings, or as a cozy snack enjoyed alongside hot cocoa during a snowy evening. This cookie brings a touch of nostalgic comfort to any winter event.
Decoration and Serving Tips:
- Festive Sugar Coating: Instead of plain granulated sugar, use red and green sanding sugars mixed together, or separate them and roll the dough balls halfway through each color for a two-toned festive coat. This adds sparkle and extra holiday cheer.
- Warm Service Option: While typically served at room temperature, these cookies are delightful served slightly warm. Heating them briefly in the microwave (about 10 seconds) will soften the chocolate kiss, making for a decadent, gooey treat.
- Icing Details: For a quick, extra flourish, use a small amount of royal icing or decorator’s gel to pipe a small star or ribbon around the base of the chocolate kiss once the cookie has cooled and set.
- The Final Press: When pressing the chocolate kiss into the cookie, do so firmly but quickly. The cookie is soft and will crack slightly; this slight cracking is desirable as it indicates a tender cookie.
Ingredients:
- For the Cookies: The dry base consists of all-purpose flour (1 1/4 cups), which should be spooned and leveled for accuracy, along with baking soda (1/2 tsp) for lift, and salt (1/4 tsp). The fat base is softened unsalted butter (1/2 cup), blended with a mix of packed brown sugar (1/2 cup) and granulated sugar (1/4 cup) for flavor and texture. A large egg and pure vanilla extract (1 tsp) bind the dough. The signature ingredient is creamy peanut butter (3/4 cup), which adds richness and moisture. The cookies are topped with 24 unwrapped chocolate kiss candies.
- For the Coating: The coating is simple granulated sugar (1/2 cup), which provides a subtle crunch, or alternatively, a festive mix of green sanding sugar (1/4 cup) and red sanding sugar (1/4 cup) for holiday sparkle.
Instructions:
Step 1: Prep Dry and Wet Ingredients
Whisk the flour, baking soda, and salt together in a medium bowl. Set aside. In a large bowl using a hand mixer or a stand mixer fitted with a paddle attachment, beat the softened butter for 1 minute on high speed until it is smooth and creamy. Switch to medium-high speed and beat in the brown sugar and ¼ cup of granulated sugar until the mixture is completely creamed and smooth, about 2 minutes. Add the large egg and beat until just combined, about 1 minute. Scrape down the sides and bottom of the bowl with a silicone spatula as needed. Add the creamy peanut butter and vanilla extract and beat until the mixture is uniform.
Step 2: Form Dough and Chill
Add the flour mixture to the wet ingredients and beat on low speed until combined. The dough will be very creamy and soft—this is correct for a tender cookie. Cover the bowl tightly and chill the cookie dough in the refrigerator for at least 1 hour, and up to 3 days. Chilling the dough is essential for firming up the fat, which helps the cookies maintain their thick shape during baking and prevents them from spreading too much.
Step 3: Roll and Bake
Preheat your oven to 350°F (177°C). Line two large baking sheets with parchment paper or silicone baking mats. Also, clear space in your freezer for the later setting step. Scoop and roll the cookie dough into balls, using about 1 heaping Tablespoon of dough for each cookie. Roll each ball completely in the ½ cup of granulated sugar (or sanding sugar mix) and arrange them on the baking sheet about 3 inches apart. Bake for 11–13 minutes or until the tops of the cookies begin to slightly crack. The centers should still look soft and pale—avoid over-baking.
Step 4: Set the Chocolate and Serve
Remove the hot cookies from the oven and allow them to cool on the baking sheets for 5 minutes. Immediately press a chocolate kiss candy into the center of each cookie. Working quickly, use a thin spatula to gently transfer the cookies to a large plate or a few smaller plates. Place the plate(s) of cookies directly in the freezer for 10 minutes. This quick chill is crucial as it sets the chocolate firmly into the cookie, preventing it from melting and losing its shape. Remove from the freezer and serve. The cookies stay fresh covered at room temperature for up to 1 week.
Make Ahead Options
These Peanut Butter Blossoms are exceptionally freezer-friendly, allowing you to prepare them well in advance of your holiday rush. The cookie dough can be made and stored, covered, in the refrigerator for up to 3 days. Alternatively, you can scoop the dough into balls, roll them in the sugar coating, and freeze the raw dough balls in an airtight container for up to 3 months. When ready to bake, place the frozen balls directly on a lined baking sheet and add 1-2 minutes to the bake time. Once baked, the finished cookies (without the chocolate) can also be frozen and thawed overnight before the chocolate kiss is added and chilled.
Storage Tips for Peanut Butter Blossoms
- Room Temperature: Once fully cooled and the chocolate is set, the cookies stay fresh covered at room temperature for up to 1 week. Ensure they are kept in an airtight container to maintain softness.
- Refrigeration: Refrigeration is generally not necessary but can prolong freshness up to 10 days. If chilled, allow the cookies to come back to room temperature before serving for the best flavor and texture.
- Freezer: As noted above, the dough balls can be frozen for up to 3 months. Finished cookies (without chocolate) can also be frozen. Add the chocolate kiss after thawing the cookie and giving it a brief re-chill.
Tips for the Best Peanut Butter Blossoms
- Use Room Temperature Ingredients: Ensure the butter and egg are at room temperature. This is essential for a proper creaming process, which creates air pockets for a fluffy, tender cookie.
- Cream Thoroughly: Do not rush the creaming step. Beating the butter and sugars until light and fluffy (about 2 minutes) incorporates air, resulting in a thicker, softer cookie.
- Chill the Dough: Do not skip the 1-hour chilling time. This firms up the fat, prevents spreading, and makes the soft dough easier to handle and roll.
- The Freezer Step is Key: The 10-minute freeze immediately after pressing in the chocolate is mandatory. Without it, the residual heat of the cookie will melt the chocolate kiss into a messy puddle.
- Bake Until Barely Done: These cookies should be removed from the oven when the edges are set and the centers still look soft. They will finish cooking on the pan, resulting in a perfectly soft, chewy texture.
Peanut Butter Blossoms Variations & Substitutions:
- Alternative Peanut Butter: While creamy is standard, you can certainly use crunchy peanut butter for added texture. However, avoid using natural-style peanut butter where the oil separates, as this will result in a dry cookie.
- Chocolate Chip Dough: Fold ½ cup of mini chocolate chips into the dough before chilling for an extra boost of chocolate flavor throughout the cookie base.
- Different Toppings: Instead of the classic milk chocolate kiss, use dark chocolate kisses, peanut butter-filled kisses, or even a simple square of white chocolate on top.
- Flavor Extracts: Add a small splash of maple extract or increase the vanilla extract to 1 ½ teaspoons for a slightly different flavor profile that complements the peanut butter.
What to Serve with Peanut Butter Blossoms:
The sweet and salty profile of these cookies pairs beautifully with a simple glass of cold milk, which is the traditional complement. For a holiday gathering, serve them alongside a cup of rich, dark hot cocoa, a mug of black coffee, or a glass of eggnog. The coolness of a simple vanilla ice cream also provides a lovely contrast to the warmth and chewiness of the cookie.
Peanut Butter Blossoms FAQs:
- Why are my cookies dry and crumbly?
This is usually caused by over-measuring the flour (always spoon and level) or using a natural-style peanut butter where the oils have separated. Make sure to use a standard, well-blended creamy peanut butter for the best texture. - Can I use natural peanut butter?
It is highly discouraged. Natural, un-stirred peanut butter is too oily, and natural peanut butter where the oil has separated is too dry. For reliable, soft results, use a standard processed creamy peanut butter. - How do I know when the cookie is done?
The cookie is done when the edges are lightly set and the center still looks puffy and soft, with small cracks starting to form on the surface. They should not be golden brown across the top. - What is the purpose of chilling the dough?
Chilling the dough allows the fat (butter and peanut butter) to firm up. This is essential for preventing the cookies from spreading too thinly in the oven and helps them bake into the desired thick, soft shape. - Can I skip the chocolate freezing step?
No, the 10-minute freeze is mandatory. The cookies are still hot after coming out of the oven. If the chocolate is pressed in without the subsequent freeze, the chocolate will melt into a mess. The freeze quickly stops the melting process and sets the shape.
Classic Peanut Butter Blossoms
Ingredients
For the Cookies
- 1 1/4 cups 156g all-purpose flour
- 1/2 teaspoon baking soda
- 1/4 teaspoon salt
- 1/2 cup 8 Tbsp; 113g unsalted butter, softened
- 1/2 cup 100g packed light or dark brown sugar
- 1/4 cup 50g granulated sugar
- 1 large egg at room temperature
- 3/4 cup about 185g creamy peanut butter
- 1 teaspoon pure vanilla extract
- 24 chocolate kiss candies unwrapped
For the Coating
- 1/2 cup 100g granulated sugar OR:
- 1/4 cup 50g green sanding sugar and 1/4 cup (50g) red sanding sugar
Instructions
- Make Dough: Whisk flour, baking soda, and salt. Cream butter and sugars for 2 minutes. Add egg, peanut butter, and vanilla; beat until combined. Add flour mixture and mix on low until just combined.
- Chill Dough: Cover and chill the dough in the refrigerator for at least 1 hour.
- Roll & Bake: Preheat oven to 350°F. Scoop dough (1 heaping Tbsp each), roll in coating sugar, and arrange on baking sheets. Bake for 11–13 minutes until the tops begin to crack. Cool on sheets for 5 minutes.
- Set Chocolate: Immediately press a chocolate kiss candy into the center of each cookie. Transfer cookies to a plate and place them in the freezer for 10 minutes to quickly set the chocolate.
Notes
- Peanut Butter: Use a standard, creamy, well-blended peanut butter, not the natural kind where the oil separates.
- Over-baking: Remove cookies when centers still look soft; they will set as they cool, ensuring a soft texture.
- Storage: Cookies stay fresh covered at room temperature for up to 1 week.