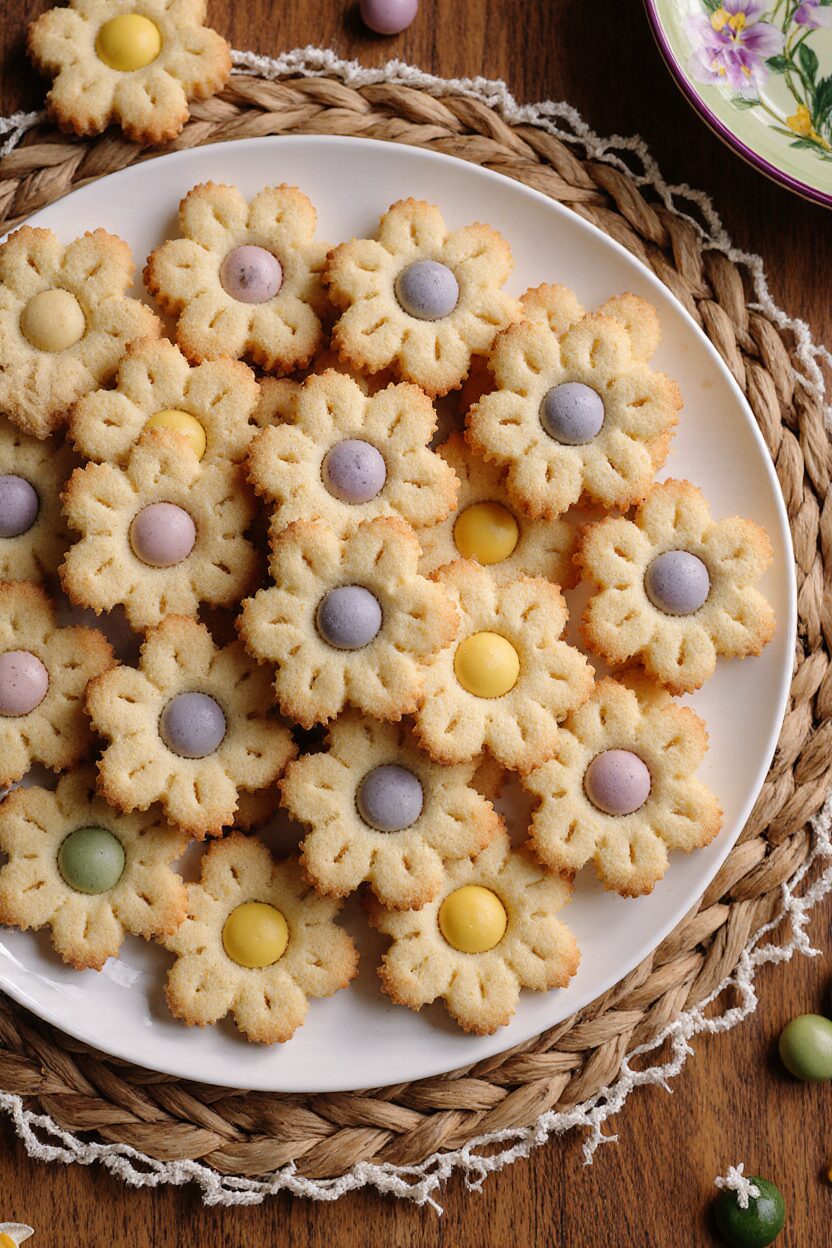
Spring Flower Shortbread Cookies — Buttery, Delicate, and Perfect for the Season
There’s something almost magical about shortbread. With just a few humble ingredients — butter, sugar, and flour — you get a cookie so tender it practically melts on your tongue. Now imagine that iconic buttery base transformed into an edible garden: dainty floral shapes, soft pastel petals, and maybe even real edible flowers baked right in. That’s what you get with Spring Flower Shortbread Cookies — a simple, elegant, and show-stopping dessert that’s just as fun to bake as it is to admire.
These cookies are everything you’d want in a spring treat. They’re lightly crisp around the edges with a rich, melt-in-your-mouth center, delicately sweet without being overwhelming, and absolutely stunning to look at. Whether you’re baking for Easter, Mother’s Day, a baby shower, or just because the sun finally came out after a long winter, these cookies are guaranteed to brighten the mood — and your dessert table.
Why You’ll Love This Recipe
- Minimal Ingredients, Maximum Impact: Just a handful of pantry staples is all it takes to make an unforgettable cookie.
- Elegant and Eye-Catching: These look like bakery cookies but are surprisingly easy to decorate at home.
- Infinitely Customizable: Add lemon zest, dip in white chocolate, or decorate with edible petals or icing.
- Make-Ahead Friendly: The dough keeps well, so you can chill it and bake fresh cookies whenever you like.
- Perfect for Celebrations: These make stunning edible gifts or centerpiece-worthy dessert trays for any spring event.
Spring Flower Shortbread Cookies Recipe
Prep Time: 20 minutes | Cook Time: 15 minutes | Total Time: 1 hour 45 minutes (includes chill time) | Servings: 24 cookies (depending on cutter size)
Ingredients You’ll Need
For the Shortbread Dough:
- 1 cup (2 sticks) unsalted butter, softened. This provides the signature flavor and soft, crumbly texture.
- 3/4 cup powdered sugar. Gives shortbread that soft, tender bite.
- 1 tsp vanilla extract. Adds warm, aromatic sweetness.
- 2 cups all-purpose flour. Provides structure without making the cookie tough.
- 1/2 tsp salt. Brings out all the natural sweetness.
Optional Enhancements:
- Zest of 1 lemon or orange (optional)
- Edible flowers (fresh pansies/violas), pastel icing, or white chocolate for decoration (optional)
Step-by-Step Instructions
Step 1: Cream the Butter and Sugar
Start by creaming your softened butter with powdered sugar until light and fluffy. This step is crucial for the texture — don’t rush it. Add in your vanilla extract (or any alternative flavoring you’re using) and mix until incorporated.
Step 2: Add the Flour
Sift the flour and salt into the bowl, and mix on low just until a soft dough forms. Do not overwork the dough—this can make the cookies tough. If adding zest, fold it in now. The dough should be able to be pressed into a soft ball.
Step 3: Chill the Dough
Wrap the dough in plastic wrap and press it into a flat disk. Refrigerate for at least 1 hour (or up to 2 days). This chill time makes it easier to roll out and helps the cookies hold their shape while baking.
Step 4: Roll and Cut
Lightly flour your surface and roll the dough to about 1/4 inch thickness. Use flower-shaped cookie cutters or simple rounds. Press gently if adding edible flowers now. Transfer the cutouts to a parchment-lined baking sheet and refrigerate again for 10–15 minutes. This quick chill prevents spreading.
Step 5: Bake
Bake at 325°F (160°C) for 12–15 minutes, or until the edges are just starting to turn golden. Let cool on the sheet for a few minutes before transferring to a wire rack. They’ll firm up as they cool and will have a delicate, melt-in-your-mouth consistency.
Step 6: Decorate (Optional)
Once cooled, you can drizzle the cookies with white chocolate, outline them with royal icing, or press edible flowers gently on top. Let the decorations set fully before storing or serving.
Tips for Success
- Use Good Butter: The flavor really comes through, so a high-quality butter makes a noticeable difference.
- Don’t Overwork the Dough: Stop mixing once the flour disappears. Overmixing creates a tougher texture.
- Chill Twice: Chilling before and after cutting the dough is the secret to clean shapes and zero spreading.
- Rotate the Pan: If baking multiple trays, rotate them halfway through for even browning.
- Use Delicate Pressure for Decorating: Edible flowers and icing can break or smudge the cookie if applied too forcefully. Patience is key.
How to Store Spring Flower Shortbread Cookies
- Room Temperature: Keep in an airtight container for up to 1 week. Store decorated cookies in a single layer or with parchment between.
- Refrigerator: Chilled dough can be stored for up to 2 days before baking.
- Freezer: You can freeze the unbaked dough (well wrapped) for up to 2 months. Thaw overnight in the fridge before rolling. Baked cookies also freeze well.
Perfect For…
- Spring Parties and Picnics
- Bridal or Baby Showers
- Mother’s Day or Easter Brunch
- Garden-themed Events or Tea Parties
- Wedding Favor Bags
- Gifting in Cookie Tins or Boxes
The versatility of these cookies makes them a dream for planners and bakers alike — delicate enough for a shower, but easy enough for a weekend bake.
Enjoy!
There’s something special about slowing down to make a batch of shortbread — especially when it turns out this beautiful. These Spring Flower Shortbread Cookies aren’t just delicious; they’re a celebration of the season in every bite. With their buttery texture, elegant look, and simple preparation, they’re sure to become a staple in your spring baking routine.
Serve them with a warm cup of tea, gift them in a sweet little tin, or enjoy them one by one as you admire their beauty. However you share them, they’re bound to bring smiles.

