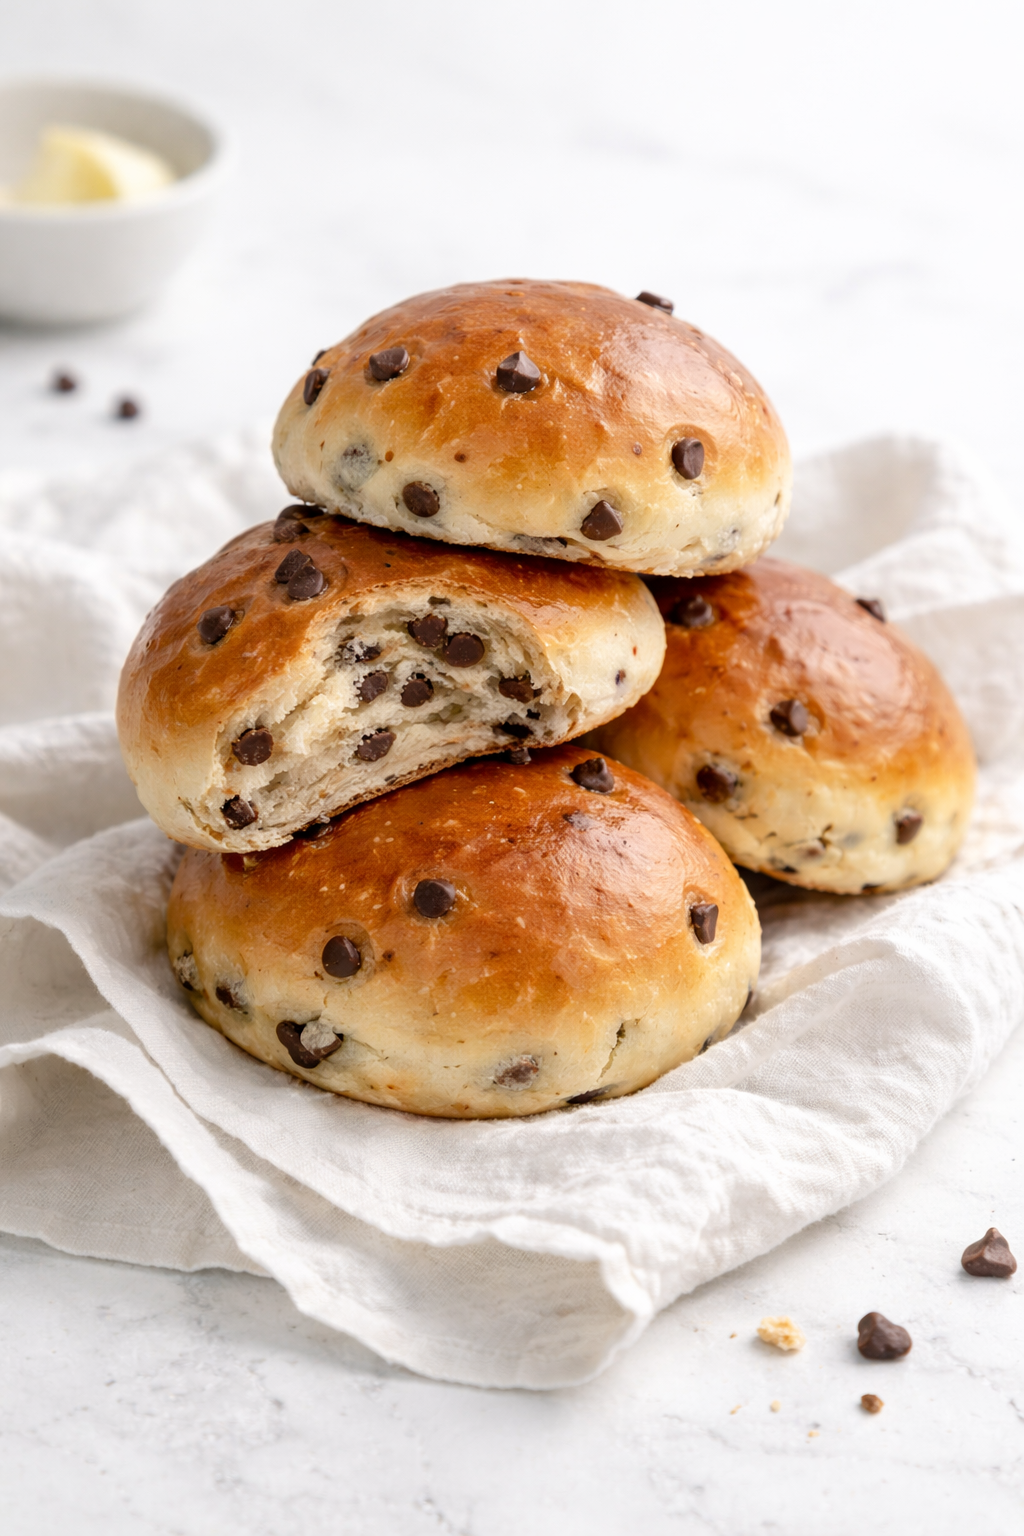
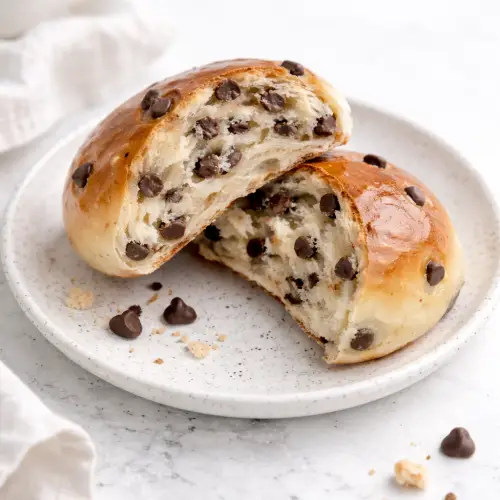
The Fluffiest Chocolate Chip Milk Buns Ever: A Heavenly Treat
There is a specific kind of magic that happens in a kitchen when yeast, warm milk, and sugar begin to interact. It is the beginning of a process that transforms humble pantry staples into something ethereal. The Fluffiest Chocolate Chip Milk Buns are the pinnacle of this transformation. These aren’t just rolls; they are pillowy, cloud-like morsels that pull apart with ease, revealing a web of soft dough and pockets of molten chocolate.
If you have ever stepped into a high-end Asian bakery and wondered how they achieve that signature “cotton-soft” texture, the answer lies in the hydration and the proofing process. This recipe brings that professional-grade fluffiness to your home kitchen. By utilizing a high-fat milk base and a double-glaze technique, we ensure that every bite is as moist as it is airy. Whether you are a seasoned bread maker or a novice looking for your first successful loaf, this guide will walk you through the science of the perfect bun.
The Science of the “Milk Bun” Texture
To understand why these buns are so much softer than a standard dinner roll, we have to look at the ingredients. Traditional bread is often made with water, which creates a crisp, chewy crust. By replacing water with 260ml of warm milk, we introduce milk fats and lactose. These elements coat the flour’s proteins, slowing down gluten development just enough to create a “short” crumb that is tender rather than tough.
Furthermore, the addition of 60g of butter and vanilla extract enriches the dough, turning it into a “luxury” dough (similar to a brioche but lighter). The real secret, however, is the double milk glaze. Brushing the dough with milk before it enters the oven helps with caramelization, but brushing it again the moment it comes out creates a steam barrier. This “shocks” the crust, softening it instantly and locking moisture inside the bun so it stays fresh for days.
Detailed Ingredient Breakdown
Achieving the perfect rise requires precision. Here is exactly what you need and why each component matters for the final result.
The Leavening Trio
- 260ml Warm Milk: This should be around 100°F to 110°F. If it’s too hot, you’ll kill the yeast; too cold, and the dough will take hours to rise.
- 1/2 Cube of Fresh Yeast (or 7g Active Dry Yeast): This provides the biological lift. Using fresh yeast gives a slightly more “floral” aroma, but standard American dry yeast works perfectly.
- 3 Tablespoons Sugar: Beyond adding sweetness, the sugar acts as “food” for the yeast, helping it produce the carbon dioxide needed for those fluffy air pockets.
The Structural Base
- 450g All-Purpose Flour: This provides the necessary protein for the dough to stretch.
- 1/2 Packet (approx. 1 tsp) Baking Powder: While the yeast does the heavy lifting, the baking powder provides a “chemical kick” in the oven, ensuring maximum “oven spring.”
- A Pinch of Salt: Essential for tightening the gluten structure and balancing the sweetness of the chocolate.
The Flavor and Texture
- 60g Butter: Softened to room temperature so it incorporates seamlessly into the flour.
- 150g Chocolate Chips: Semi-sweet or dark chocolate chips are recommended to provide a contrast to the sweet milk dough.
- 8g Vanilla Extract: Adds a nostalgic, comforting aroma that mimics the flavor of a high-end pastry.
Step-by-Step: Mastering the Rise
1. The Activation and Knead
Start by whisking your yeast into the warm milk along with the sugar. Let it sit for about 10 minutes until a foamy “head” appears. In a large bowl, combine this mixture with your melted butter, vanilla, and baking powder. Gradually add your flour and salt.
Now comes the work: Kneading. Whether you are using your hands or a stand mixer, you must knead for a full 5–10 minutes. You are looking for the “windowpane test”—where you can stretch a small piece of dough thin enough to see light through it without it tearing. Once the dough is smooth, gently fold in the chocolate chips.
2. The First Rise (Bulk Fermentation)
Place your dough in a lightly greased bowl and cover it airtight with plastic wrap. Place it in a warm, draft-free spot. Let it rise for 1 hour or until it has at least doubled in size. This step is where the flavor develops and the yeast creates the first round of air bubbles.
3. Shaping and the Second Proof
Gently deflate the dough and turn it onto a lightly floured surface. Depending on how large you want your treats, divide the dough into 8, 10, or 12 equal portions. Roll them into tight, smooth balls.
Place them on a baking sheet lined with parchment paper. Cover them with a clean kitchen towel and let them rise for another 20 minutes. This second rise is crucial; it relaxes the gluten after the shaping process, ensuring the buns expand upward in the oven rather than staying dense.
4. The Double Glaze Baking Method
Preheat your oven to 190°C (374°F). Just before sliding the tray in, brush the tops of the buns generously with milk. This creates a soft, golden sheen. Bake for 20–25 minutes.
The Pro Secret: The second the buns come out of the oven, brush them again with 3-4 tablespoons of cold milk. You will hear a slight sizzle. This creates a beautiful shine and a texture that is impossibly soft to the touch.
Frequently Asked Questions (Q&A)
Can I use bread flour instead of all-purpose flour? Yes. Bread flour will give the buns a slightly more “chewy” and elastic texture, similar to a traditional loaf. All-purpose flour will keep them more “cake-like” and tender.
What if my dough isn’t rising? Check your milk temperature. If it was too hot (over 120°F), the yeast may have been deactivated. Alternatively, if your kitchen is cold, try placing the bowl inside an oven that is turned off but has the oven light turned on. The small amount of heat from the bulb is often enough to help the dough rise.
How do I store these? Because of the milk glaze, these stay soft for about 2–3 days in an airtight container at room temperature. For longer storage, you can freeze them for up to a month. To serve from the freezer, just microwave for 20 seconds.
Can I make these nut-free? Yes, this recipe is naturally nut-free. However, always check your chocolate chip packaging to ensure they weren’t processed in a facility with allergens if you are baking for someone with a sensitivity.
Decoration and Serving Suggestions
To elevate these from a simple snack to a gourmet dessert:
- The “Snow” Finish: Once the buns are completely cool, a light dusting of powdered sugar makes them look like they belong in a winter wonderland.
- The Decadent Drizzle: Melt a handful of extra chocolate chips with a teaspoon of coconut oil and drizzle it in zig-zags across the tops.
- The Tea Pairing: These buns are spectacular when served alongside a hot cup of Earl Grey or a cold glass of milk.
The Fluffiest Chocolate Chip Milk Buns
Ingredients
- Ingredients
- 450 g All-purpose flour
- 260 ml Whole milk warmed (approx. 40°C)
- 60 g Unsalted butter softened or melted
- 1/2 Cube fresh yeast or 7g/1 packet active dry yeast
- 3 tbsp Granulated sugar
- 1 tsp Baking powder approx. 1/2 packet
- A pinch of salt
- 150 g Chocolate chips
- 8 g Vanilla extract approx. 1 tbsp
- 4 tbsp Milk reserved for glazing
- Instructions
- Yeast Prep: In a large bowl whisk together the warm milk, yeast, sugar, butter, and vanilla. Let sit for 10 minutes until foamy.
- Mix & Knead: Stir in the baking powder flour, and salt. Knead by hand or with a stand mixer for 5–10 minutes until the dough is smooth and elastic.
- Chocolate: Gently fold the chocolate chips into the dough until evenly distributed.
- First Rise: Place dough in a greased bowl cover airtightly, and let rise in a warm spot for 1 hour.
- Shape: Divide the dough into 10 equal portions and roll into smooth balls. Place on a parchment-lined tray.
- Second Proof: Cover with a towel and let rise for another 20 minutes.
- First Glaze & Bake: Preheat oven to 190°C 374°F. Brush the tops of the buns with milk. Bake for 20–25 minutes until golden.
- Final Glaze: Immediately after removing from the oven brush the hot buns once more with the remaining milk.
- Cool: Let the buns cool slightly on a wire rack before serving.
Instructions
- The Milk Trick: Brushing milk on hot buns is what gives them that incredible "cotton-soft" crust.
- Warmth: Ensure your ingredients (eggs/milk) are not cold from the fridge for the best rise.
- Add-ins: You can substitute chocolate chips with raisins or dried cranberries for a fruit-filled version.