
Bakery-Style No-Knead Ciabatta Bread
Ciabatta bread is one of those recipes that looks like it came straight from an artisan bakery, but it can actually be made at home with very simple ingredients. This no-knead ciabatta recipe is all about letting time do most of the work. Instead of kneading the dough by hand or using a stand mixer, the dough rests slowly overnight, developing flavor, structure, and those beautiful airy holes that make ciabatta so special.
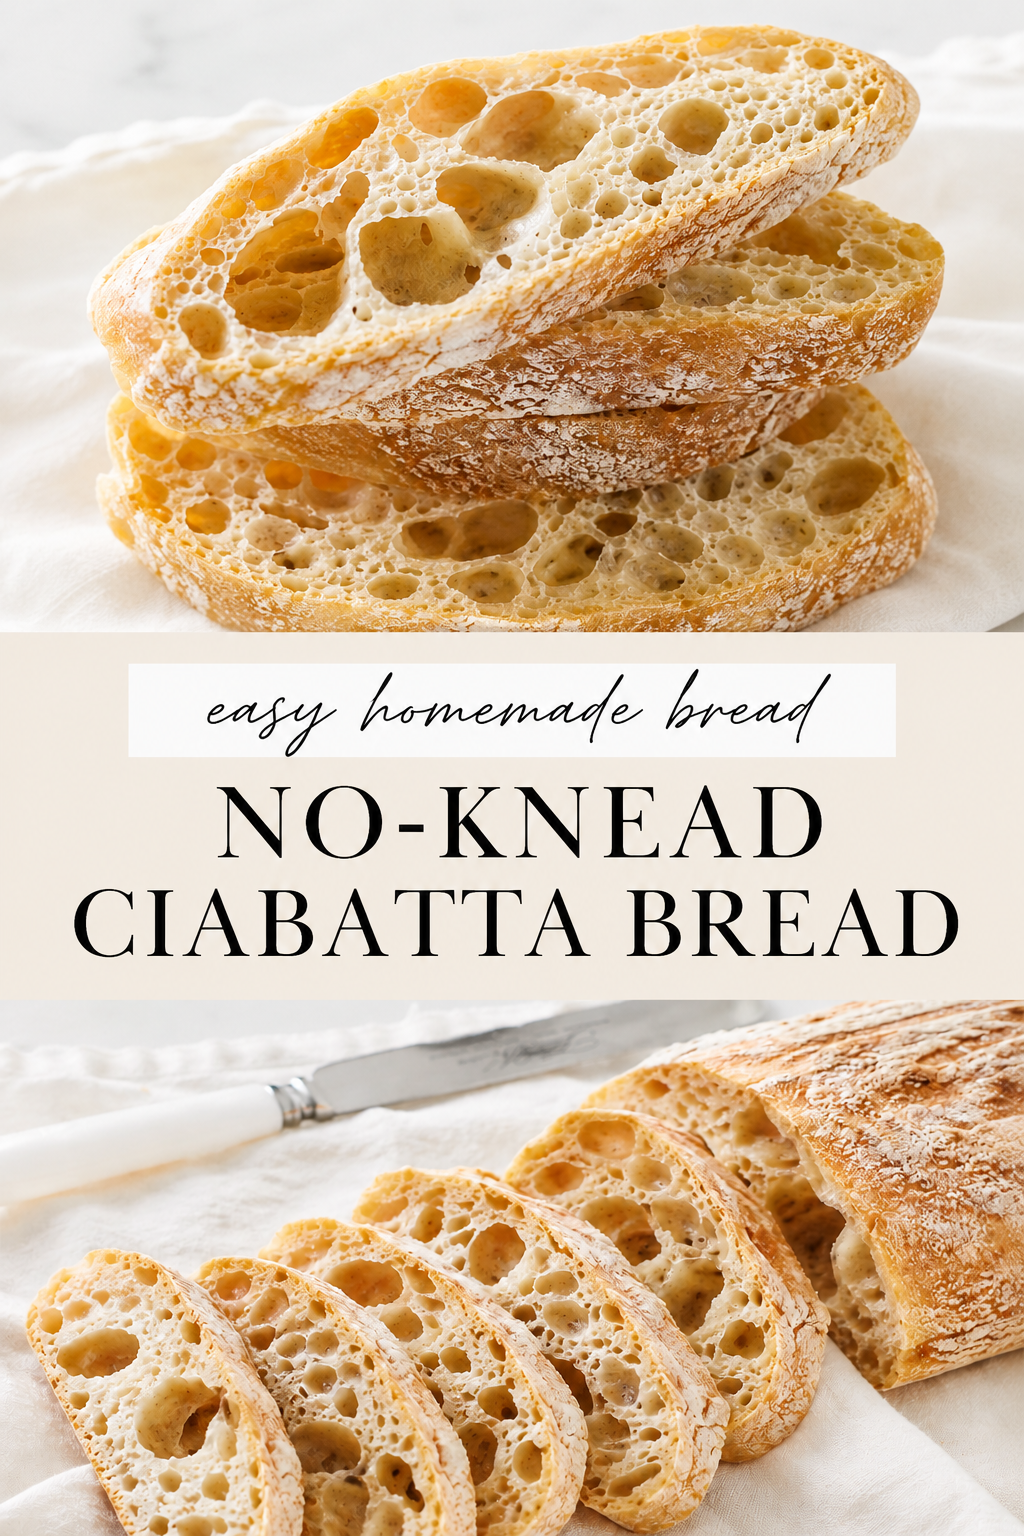
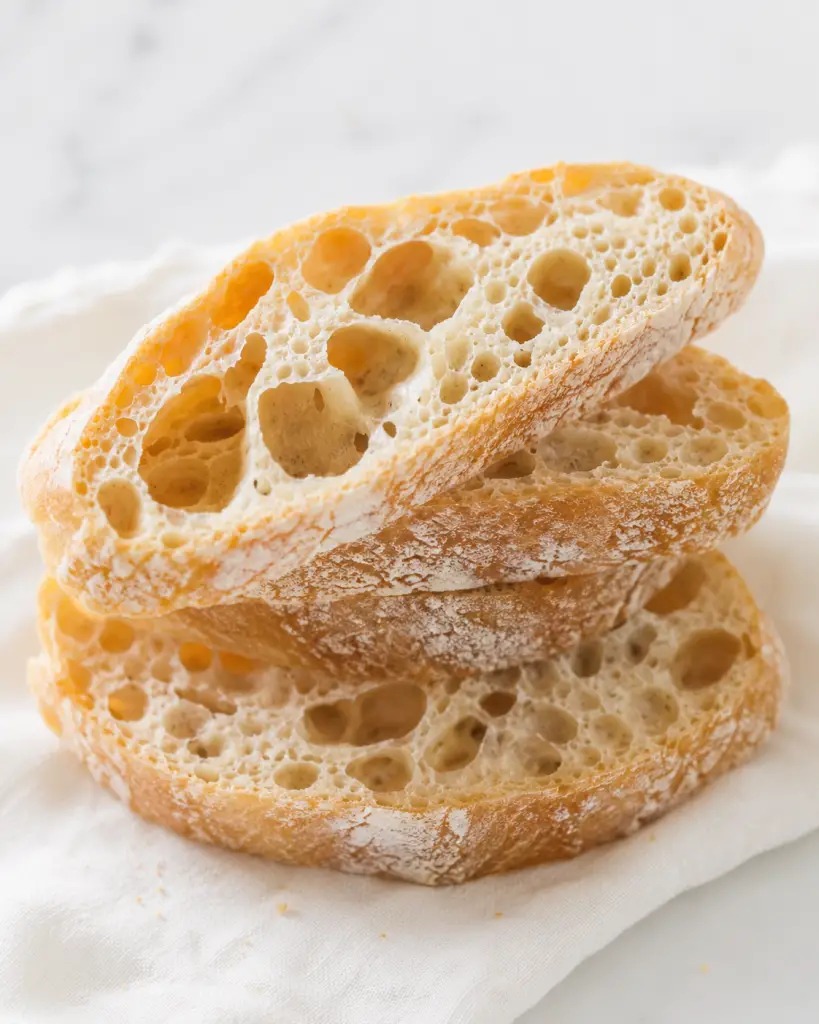
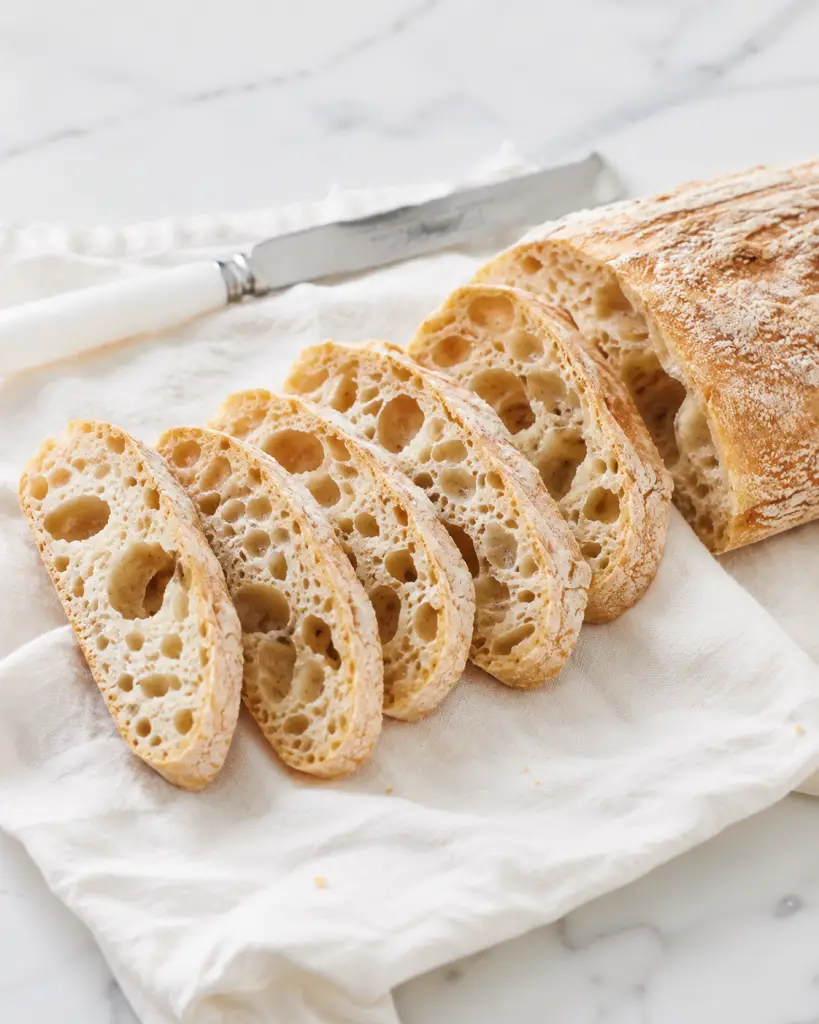
This bread has a rustic golden crust, a chewy interior, and a light open crumb. It is the kind of bread that feels impressive when sliced, but the process is surprisingly simple. The dough is very wet, which might feel unusual if you are used to making softer sandwich-style bread, but that high hydration is exactly what gives ciabatta its signature texture.
The best part about this recipe is that you do not need special equipment. You do not need a bread machine, a dough hook, or complicated shaping skills. A bowl, a spoon, a baking sheet, and patience are enough. The overnight rest gives the flour time to fully hydrate and allows the yeast to work slowly, creating deeper flavor and better texture.
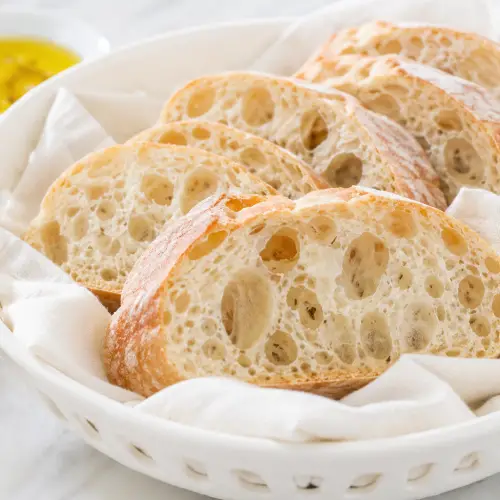
This ciabatta is perfect for sandwiches, toast, garlic bread, dipping into olive oil, serving with soup, or enjoying warm with butter. It has that bakery-style look with a crisp crust and a soft, chewy center, but it is made with basic pantry ingredients.
Because the dough needs a long overnight rest, this is a great recipe to start the evening before you want to bake. Mix the dough at night, let it ferment while you sleep, shape it the next day, and bake it into two rustic loaves.
Why You’ll Love This No-Knead Ciabatta Bread
This ciabatta recipe is perfect if you love homemade bread but do not want a complicated process. The dough does not require kneading, which makes the recipe much easier and less messy than many traditional bread recipes.
The flavor is one of the biggest reasons to love it. The long overnight fermentation gives the bread a deeper, more developed taste. Instead of rushing the dough with lots of yeast, this recipe uses a small amount and gives it plenty of time. That slow rise creates a better flavor and a more bakery-style texture.
The texture is also beautiful. Ciabatta is known for its open crumb, chewy bite, and crisp outer crust. The dough is wetter than many bread doughs, which helps create those airy pockets inside the loaf. Once baked, the bread has a rustic look with golden edges and a soft inside.
This recipe also makes two loaves, which is helpful if you want one for serving fresh and one for saving. You can freeze one loaf, slice it for toast, or turn leftovers into garlic bread, paninis, croutons, or bread for dipping.
It is also a very flexible recipe. Bread flour gives the best chew, but you can use all-purpose flour if needed. A little whole wheat flour adds flavor and depth without making the bread too dense. Olive oil adds a subtle richness and helps create a tender texture.
Most importantly, this recipe is beginner-friendly. Even if the dough looks sticky or loose, that is normal for ciabatta. You do not need to make it look perfect. Rustic shape is part of the charm.
What Makes Ciabatta Bread Different?
Ciabatta is different from softer sandwich breads because it has a wetter dough, a more open texture, and a chewier crust. The name is often associated with its flat, slipper-like shape, and the finished loaf usually has a rustic look rather than a perfectly smooth top.
The dough has a high amount of water compared to flour. This makes it sticky and loose, but it also helps create steam during baking. That steam expands inside the dough and creates the large air pockets ciabatta is known for.
Unlike sandwich bread, ciabatta is not meant to be tight, fluffy, and uniform. It should look rustic and irregular. Some slices may have bigger holes than others, and that is part of what makes it feel bakery-style.
Ciabatta also works especially well for savory uses. The chewy texture holds up beautifully for sandwiches, toasted bread, garlic bread, and dipping. It has enough structure to stay sturdy, but it is still soft enough inside to enjoy fresh.
Ingredients You’ll Need
Bread Flour
Bread flour is the best choice for ciabatta because it has more protein than regular all-purpose flour. This extra protein helps create gluten strength, which gives the bread its chewy texture. Since ciabatta is a wet dough, the structure from bread flour is very helpful.
If you only have all-purpose flour, you can still make this recipe. The bread may be slightly softer and less chewy, but it will still bake into a good rustic loaf.
Whole Wheat Flour
A small amount of whole wheat flour adds extra flavor and depth. It gives the bread a slightly more rustic taste without making it heavy. Since the recipe only uses a little whole wheat flour, the final loaf still stays light and airy.
Salt
Salt is important for flavor. Without it, bread can taste flat. Salt also helps strengthen the dough and balance the flavor of the flour and yeast.
Instant Yeast
This recipe uses a small amount of instant yeast because the dough has a long fermentation time. The slow rise gives the bread more flavor and a better texture than a fast rise with a larger amount of yeast.
Instant yeast is convenient because it can be mixed directly into the flour without needing to be activated separately.
Lukewarm Water
Water hydrates the flour and creates the wet dough needed for ciabatta. The water should be lukewarm, not hot. If the water is too hot, it can damage the yeast. If it is too cold, the dough may rise more slowly.
Olive Oil
Olive oil adds a subtle richness and helps improve the texture of the bread. It also gives the dough a little softness without making it heavy.
Why This Dough Is So Wet
Ciabatta dough is supposed to be wet and sticky. This can feel strange if you are used to bread dough that is smooth and easy to knead, but the wet texture is what helps create the airy interior.
Do not add too much extra flour just because the dough feels sticky. Adding too much flour can make the bread dense and dry. Instead, use flour only when shaping and handling the dough.
The overnight rest allows the flour to fully absorb the water. During this time, the dough becomes more elastic and flavorful even without kneading. This is why no-knead bread recipes work so well. Time replaces the physical work of kneading.
When handling the dough the next day, be gentle. You want to preserve as many air bubbles as possible. The goal is not to create a perfectly smooth loaf. The goal is to keep the dough airy and rustic.
Tips for the Best Ciabatta Bread
Use bread flour if possible. It gives the loaf a better chew and helps the dough hold its shape.
Do not rush the overnight rise. The long rest is what develops flavor and texture. Around 18 hours at room temperature works well.
Do not worry if the dough looks loose or sticky. Ciabatta dough is naturally wet, and that is what helps create the open crumb.
Dust the towel very generously with flour before proofing the loaves. Since the dough is sticky, this helps prevent it from clinging to the towel when you move it.
Handle the dough gently after the first rise. Knocking it back slightly is fine, but avoid aggressively pressing out all the air. Those bubbles are part of the final texture.
Let the bread cool before slicing. This is important because the inside continues to set as it cools. Cutting too early can make the crumb gummy.
Bake until deeply golden. Ciabatta should have a crisp crust, so do not remove it from the oven too early.
Make-Ahead Instructions
This recipe is naturally a make-ahead bread because the dough rests overnight. You can mix the dough the evening before, cover it, and leave it at room temperature for about 18 hours.
If you want to slow the process down even more, you can refrigerate the dough after mixing. Cold fermentation can help develop extra flavor. The dough can be kept in the refrigerator for up to 2 days before shaping and baking.
If the dough has been refrigerated, allow it to sit at room temperature before shaping so it becomes easier to handle and rise.
Storage Instructions
Fresh ciabatta is best enjoyed the day it is baked, especially if you want the crust to be crisp. However, leftovers can still be stored and used in many ways.
Keep leftover bread wrapped or stored in an airtight container at room temperature for up to 2 days. The crust will soften as it sits, but the bread can be refreshed in the oven.
To refresh ciabatta, warm it in a 350°F oven for several minutes until the crust becomes crisp again.
Avoid refrigerating baked bread unless necessary. Refrigeration can dry bread out and make the texture less pleasant.
Freezing Instructions
Ciabatta freezes very well. Let the bread cool completely before freezing. You can freeze the loaves whole, in halves, or sliced.
For the easiest use, slice the bread before freezing. That way, you can remove only the amount you need. Place slices in a freezer-safe bag or container and freeze for up to 3 months.
To reheat, toast slices directly from frozen or warm larger pieces in the oven until heated through. Frozen ciabatta is especially good for toast, garlic bread, croutons, and sandwiches.
Serving Ideas
Ciabatta is incredibly versatile. Serve it warm with butter for a simple classic option, or dip it into olive oil with herbs and a little flaky salt.
It is excellent for sandwiches because the chewy crust and airy interior hold fillings well. Use it for grilled sandwiches, paninis, breakfast sandwiches, or simple tomato and cheese sandwiches.
Ciabatta also makes amazing garlic bread. Slice the loaf, spread it with garlic butter, and bake until crisp and golden.
You can serve it with soups, stews, pasta dishes, salads, or roasted vegetables. It is also perfect for bruschetta because the texture holds toppings well after toasting.
If the bread becomes a little stale, cut it into cubes and make croutons or use it for savory bread pudding.
Variations and Substitutions
If you do not have bread flour, you can use all-purpose flour. The bread may be slightly less chewy, but it will still work.
If you want a more rustic flavor, increase the whole wheat flour slightly, but do not replace too much of the bread flour or the loaf may become heavier.
You can add herbs to the dough, such as rosemary, thyme, or oregano, for a savory version.
For extra flavor, add a small amount of sourdough discard to the dough. This can give the bread a more complex taste and help improve texture.
You can also sprinkle the tops with a little flour before baking for a more rustic bakery-style finish.
Frequently Asked Questions
Can I make ciabatta without kneading?
Yes. This recipe is designed to be no-knead. The long resting time develops the dough naturally, so you do not need to knead it by hand or use a mixer.
Why is my ciabatta dough so sticky?
Ciabatta dough is meant to be sticky because it has a high water content. This wet dough helps create the airy holes and chewy texture. Avoid adding too much extra flour.
Can I use all-purpose flour instead of bread flour?
Yes. All-purpose flour can work, but the bread may not be as chewy. Bread flour gives the best bakery-style texture.
Do I have to let the dough rise overnight?
Yes, the long rise is important for flavor and texture. It also replaces the need for kneading.
Can I freeze ciabatta bread?
Yes. Let it cool completely, then freeze it whole or sliced for up to 3 months.
Why should I let the bread cool before slicing?
Bread continues to set after baking. If you cut it too soon, the inside can become gummy. Letting it cool gives you a better crumb.
Can I make garlic bread with leftover ciabatta?
Yes. Ciabatta is excellent for garlic bread because the texture crisps beautifully in the oven.
Final Thoughts
This no-knead ciabatta bread is a simple but impressive recipe that gives you bakery-style results at home. The process is mostly hands-off, and the overnight fermentation does the hard work for you. With just flour, water, salt, yeast, and olive oil, you can create rustic loaves with a golden crust, chewy texture, and airy interior.
It is a great recipe for anyone who wants to bake bread without special equipment or complicated techniques. The dough may look sticky and loose, but that is exactly what gives ciabatta its signature texture. Once baked, the loaves are perfect for sandwiches, toast, garlic bread, dipping, and serving with meals.
If you love homemade bread but want an easier method, this no-knead ciabatta is a recipe worth keeping.
Bakery-Style No-Knead Ciabatta Bread
Ingredients
- 3 ½ cups bread flour about 496 g
- ½ cup whole wheat flour about 71 g
- 1 ½ teaspoons salt
- ¼ teaspoon instant yeast
- 2 cups lukewarm water about 450 ml
- 1 tablespoon olive oil
Instructions
- In a large mixing bowl, combine the bread flour, whole wheat flour, salt, and instant yeast.
- In a separate jug or bowl, stir together the lukewarm water and olive oil.
- Pour the wet mixture into the dry ingredients and mix until a very wet, sticky dough forms. Scrape down the sides of the bowl.
- Cover the bowl tightly with plastic wrap or a reusable cover, then place a kitchen towel over the top. Let the dough ferment at room temperature for about 18 hours.
- The next day, prepare two baking sheets. Line one baking sheet with a clean kitchen towel and dust it very generously with flour. Line the second baking sheet with parchment paper.
- Uncover the dough and gently knock it back. Shape it loosely into a ball.
- Divide the dough into two equal pieces. Place the pieces side by side on the floured towel.
- Cover the dough with the towel and let the loaves proof for 2 hours.
- Preheat the oven to 425°F / 210°C.
- Once the dough has risen and bubbles have formed, carefully turn over each loaf. Gently stretch each piece into a long rustic loaf, about 16 inches.
- Transfer the shaped loaves onto the parchment-lined baking sheet.
- Bake for 35–40 minutes, or until the loaves are golden brown and crisp on the outside.
- Let the bread cool completely before slicing.